Hey friend!
Are you looking for a DIY idea to decorate a baby shower?
Look no further – I’ve got the cutest DIY baby shower favor idea and I’m going to show you exactly how to make them for yourself!
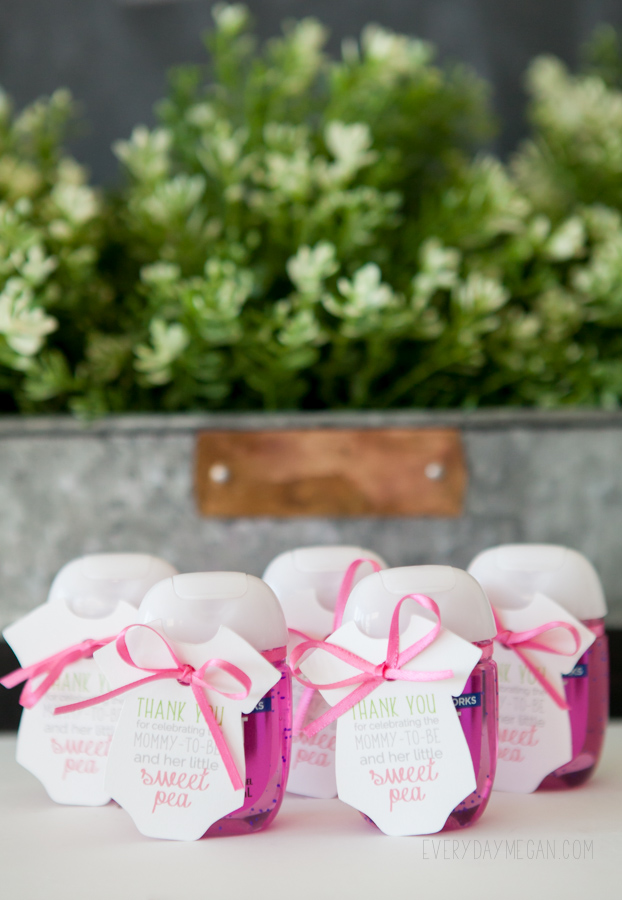
Isn’t it adorable?
The little onesies are designed to attached to a Bath and Body Works Sweet Pea hand sanitizer. Get it? Pun intended. 🙂
I designed a cut file to use with a Silhouette Cameo cutting machine so they turn out perfectly and there is no need to mess with trying to cut them out by hand! (Which – by the way – you totally could print and hand cut them out.)
If you don’t know what a Silhouette Cameo is – it is an amazing crafting tool and I totally think you need one if you like to make little handmade gifts and crafts! 🙂 You can do so much with it. My original Cameo is 5 years old and it’s sill kickin’ just fine but I recently upgraded to this model and I’m so excited for the bluetooth feature! Normally I use my machine to cut vinyl for painting stuff, but today, I’m showing you how to use the print and cut feature to make this DIY baby shower favor.
Now let’s walk through exactly how to make them!
*Some of the links below are affiliate links, meaning, at no additional cost to you, I will earn a commission if you click through and make a purchase. But I never ever recommend something I don’t personally use and love.
For this tutorial, the supplies needed are:
Silhouette Cameo + Silhouette cutting mat
A printer
Bath and Body Works Sweet Pea Hand Sanitizer
Ribbon (I used one like this)
First you need to download the SVG file and save it to your computer.
Now open the Silhouette software, navigate to the downloaded file and open in the Silhouette software.
Now that you have the file open in the Silhouette Software
First thing you need to do is adjust the page size (in the page setup menu) to 8.5″ x 11″
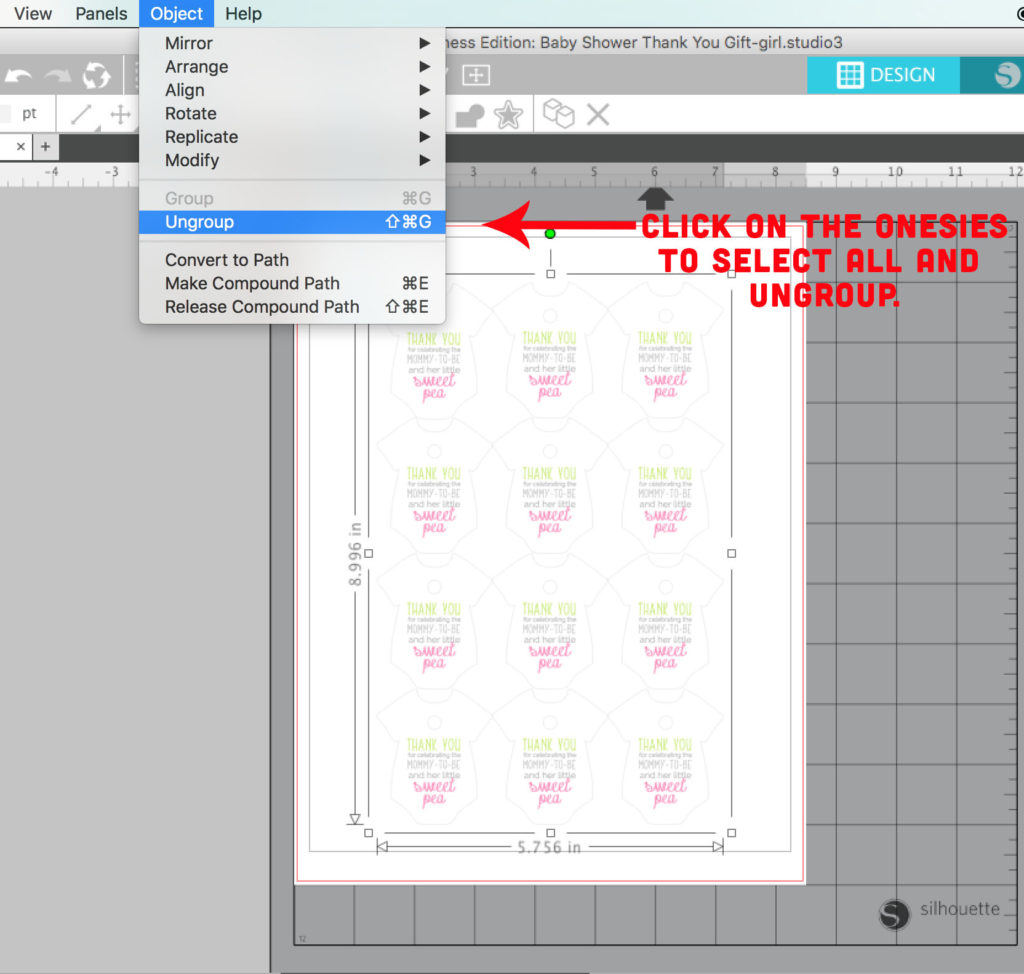
Then you’ll need to click on the onesies to select them all and go to the object menu and ungroup.
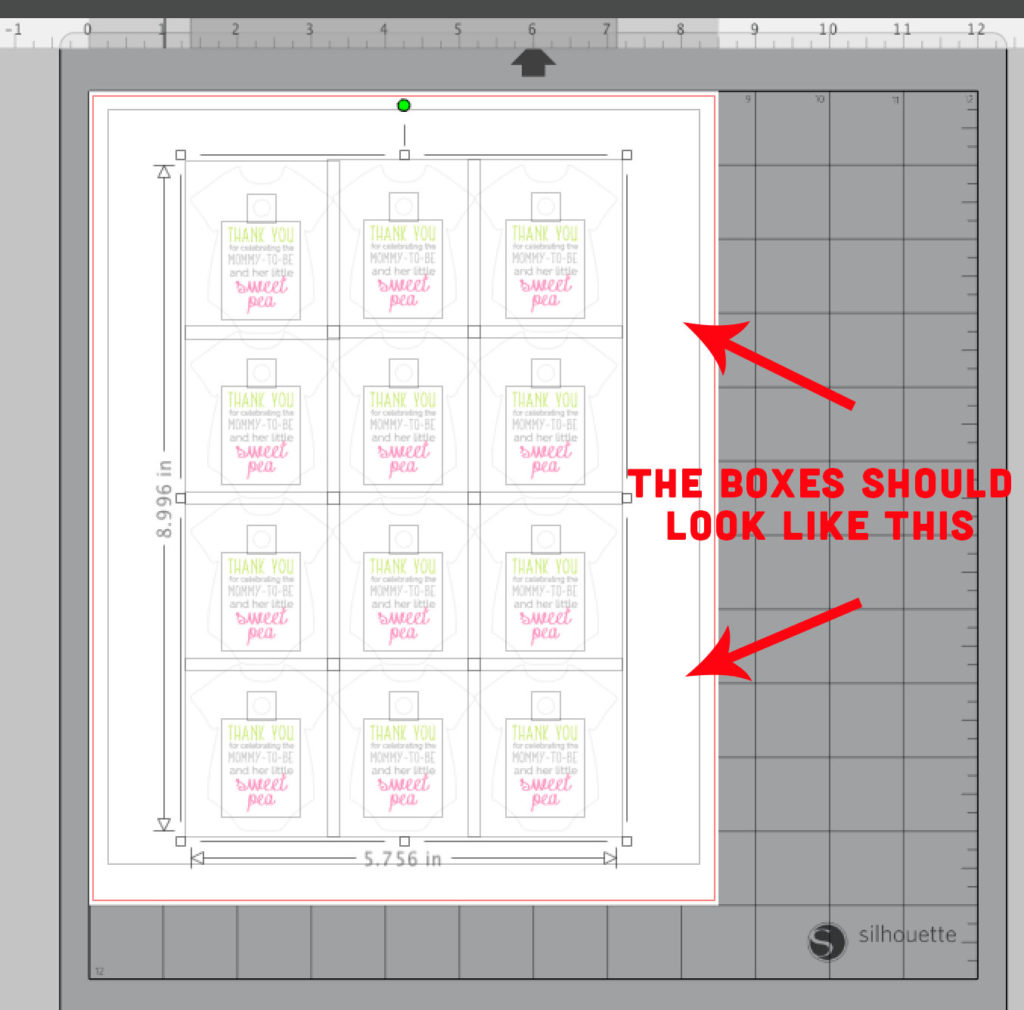
and it should look like this
Now be really careful not to move the design around (but if you do, click the undo arrow and it will go back to place)
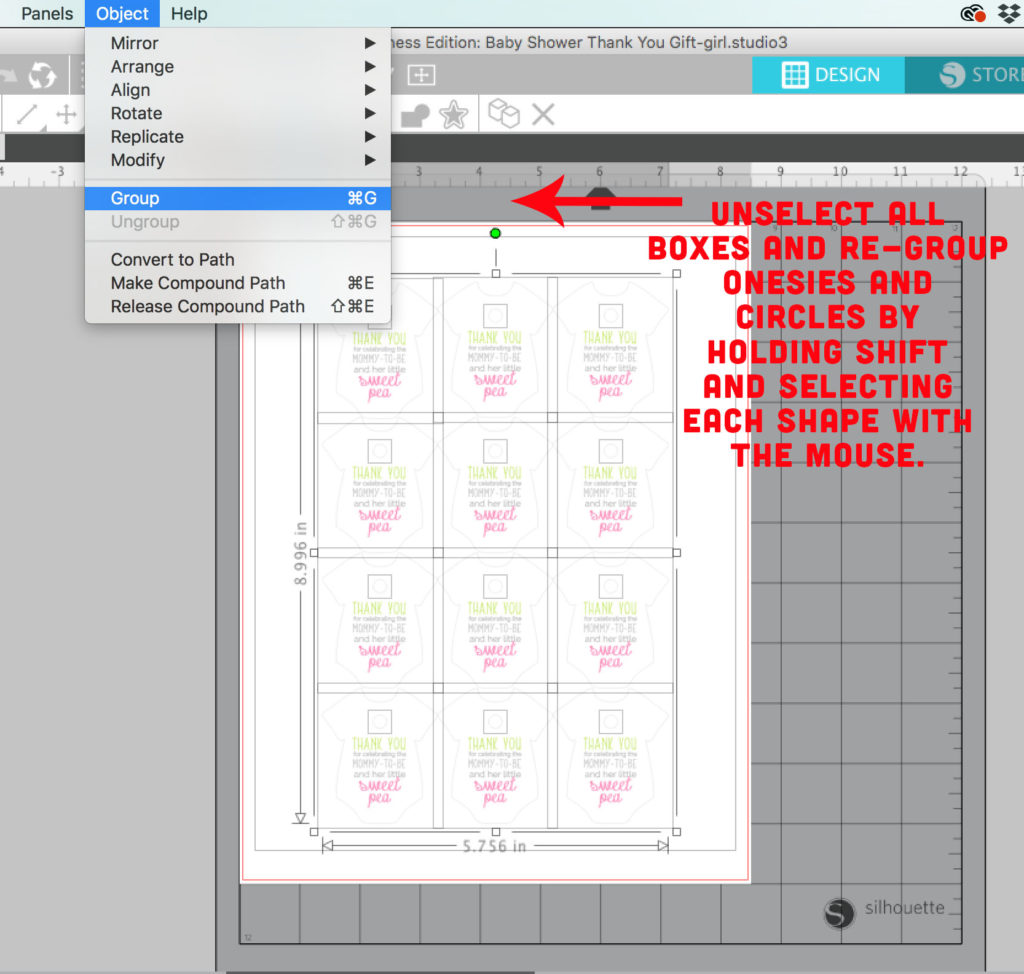
Click off of the image so the boxes go away and then hold the shift key down and start clicking on the outer most line of the onesies and click on the circle too. Group them back together under the object menu. (These are the cut lines and we will get to that later.)
Once they are grouped back together, you will have on outline box around all of the onesies.
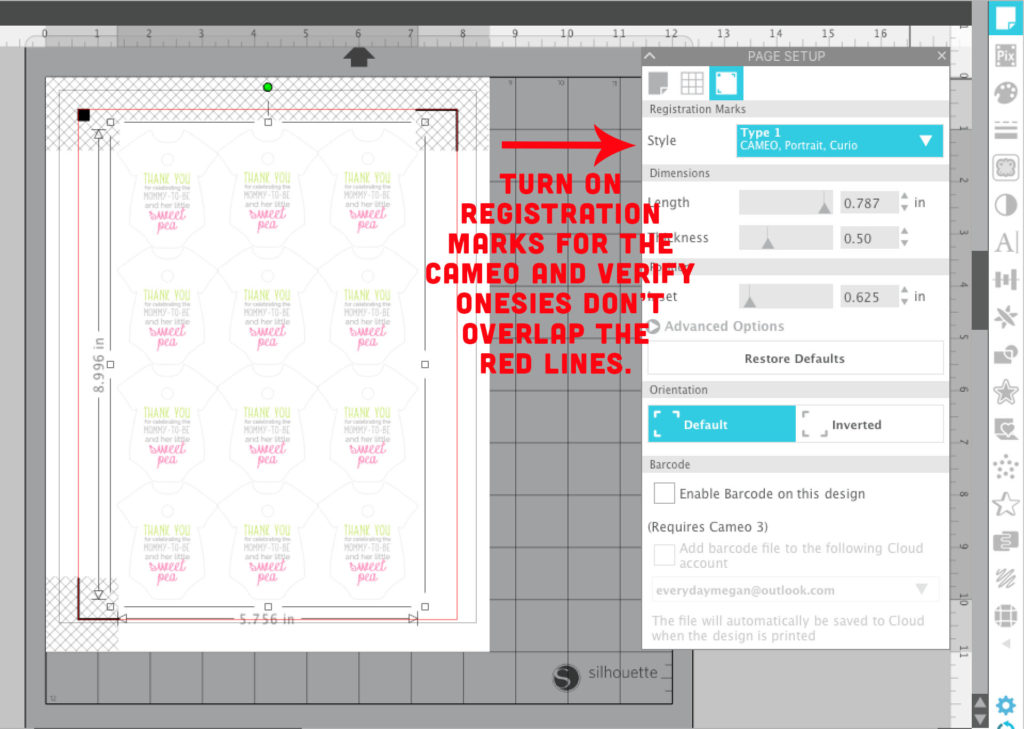
Now we need to set the registration marks so the Silhouette knows what to cut.
**This part might take some clicking around because your menu may be laid out differently depending on the version of software you have.
Go to the Page Setup menu on the side (It looks like a flat piece of paper with the corner folded back). Look for the registration marks tab, it will look like a square with marks in 3 corners. Turn the registration marks on by selecting the drop down menu next to Style and choose Cameo. Check to make sure that the onesies fall within the red cut line space.
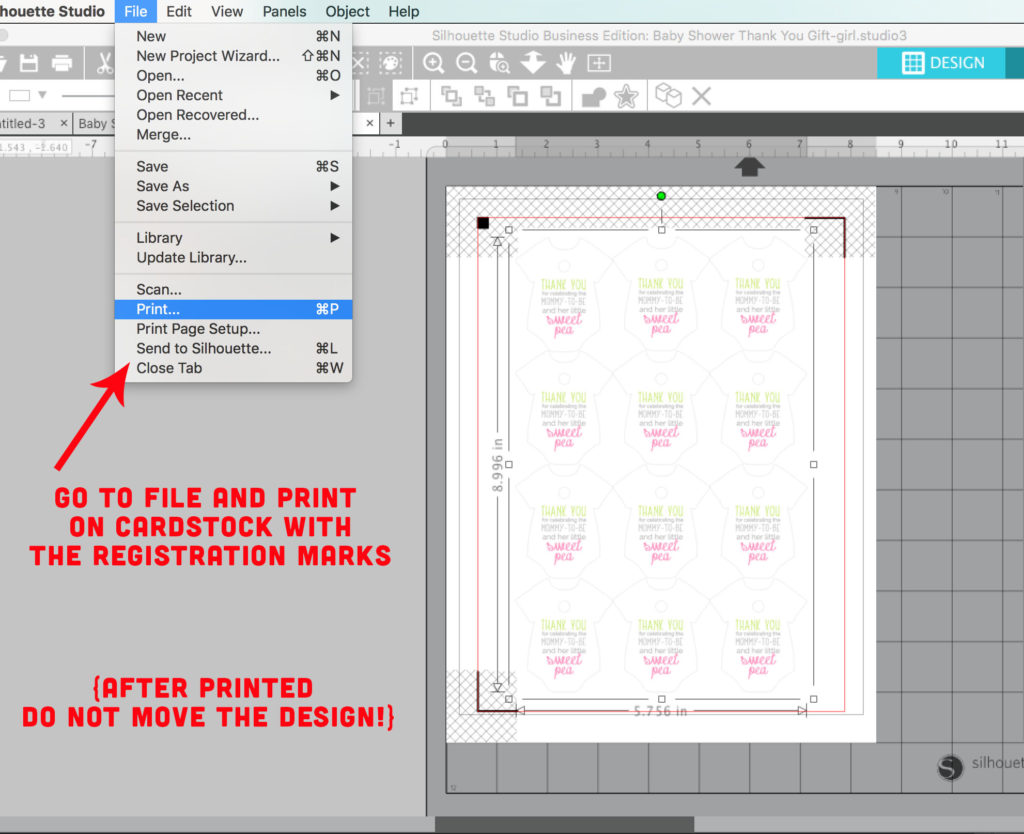
Print the design with the registration marks on the paper.
Just simply go to the menu and click print. I printed them on a 65# card stock like this to make them thicker and less flimsy but paper can totally work too.
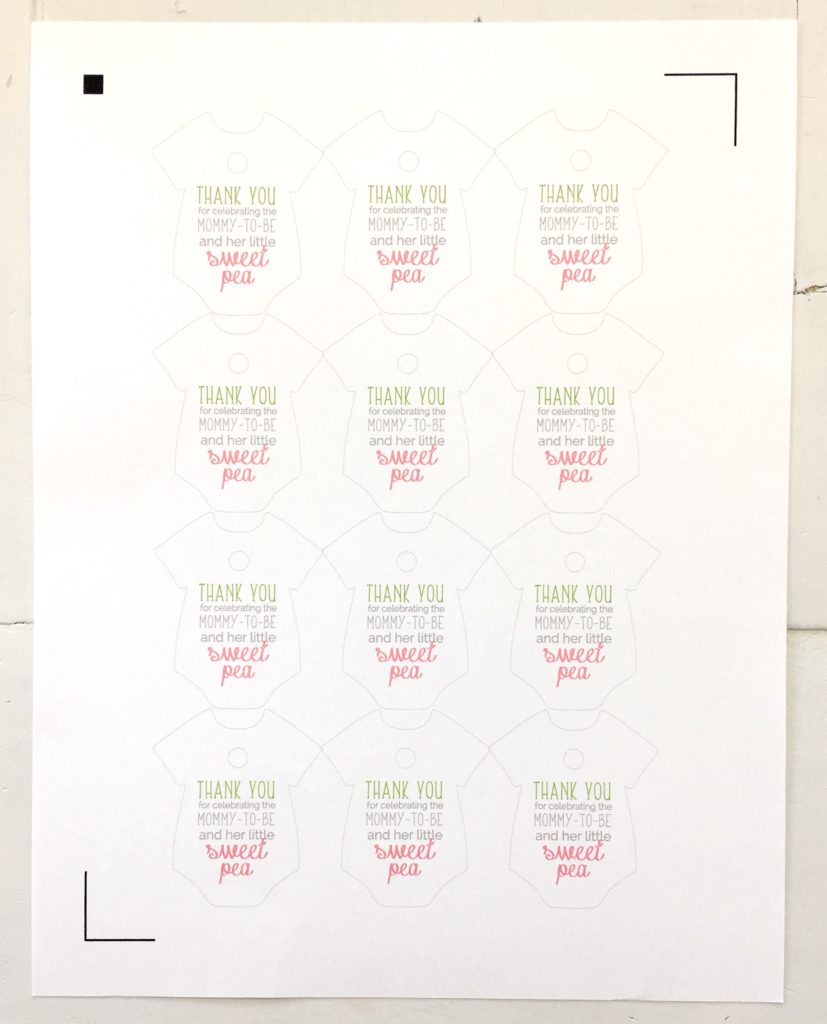
The registration marks will look like this printed on the paper. This is what tells the machine where to cut so it is very important that after you print, don’t touch the design on the screen in the slightest bit! It will mess up the cutting process.
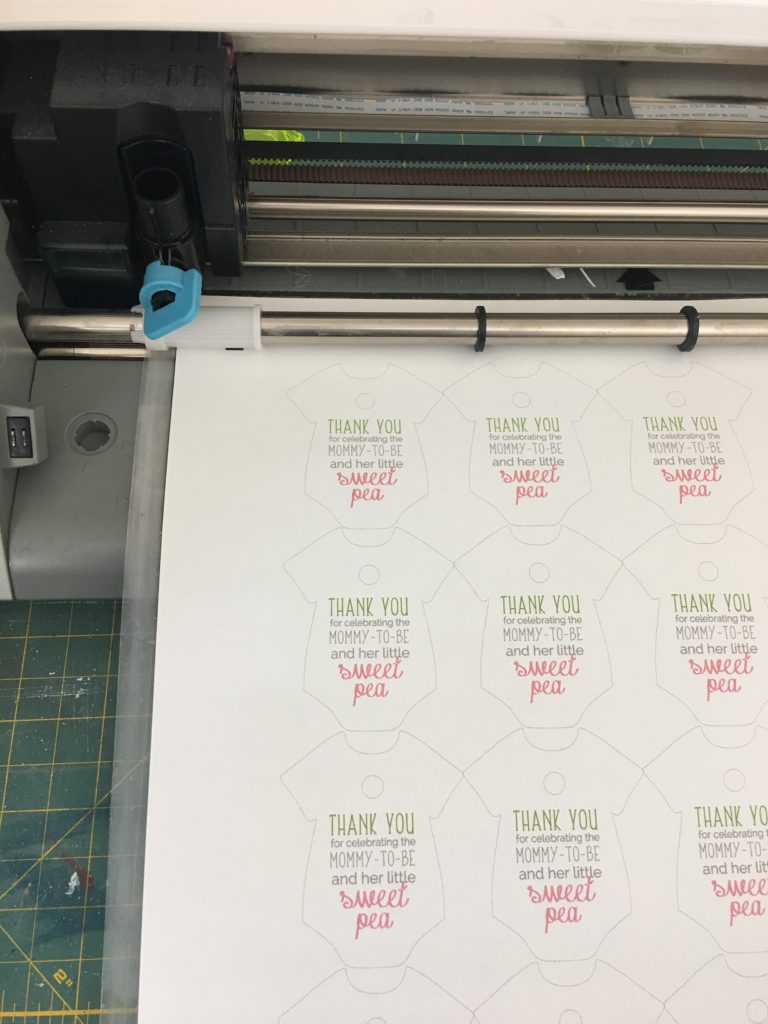
Once it is printed line the paper up along the edges of the Silhouette mat and press it down in place.
Turn the Silhouette on and load the mat in the machine using the arrows as your guide for the side of the mat.
Send to the machine
First, be sure your machine is connected to the computer.
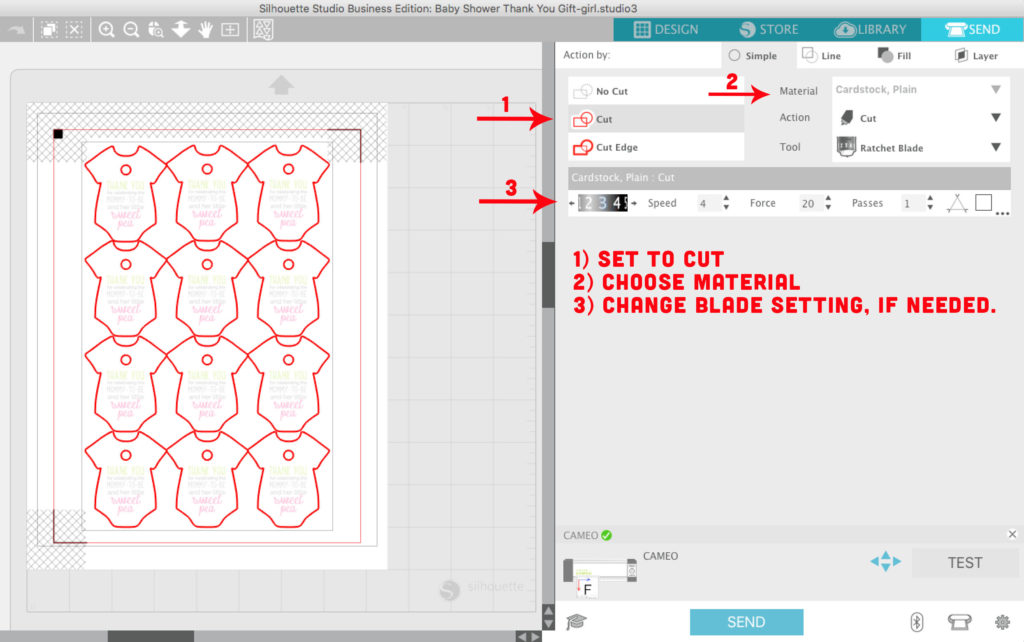
Go into the design software and choose the send tab. There are a few things to pay attention to in here. Click on “cut” to set the machine to cut. The red lines represent what will be cut. (If there is a line that is not red that should be, then go back to the design module and reselect like you did before and group together.)
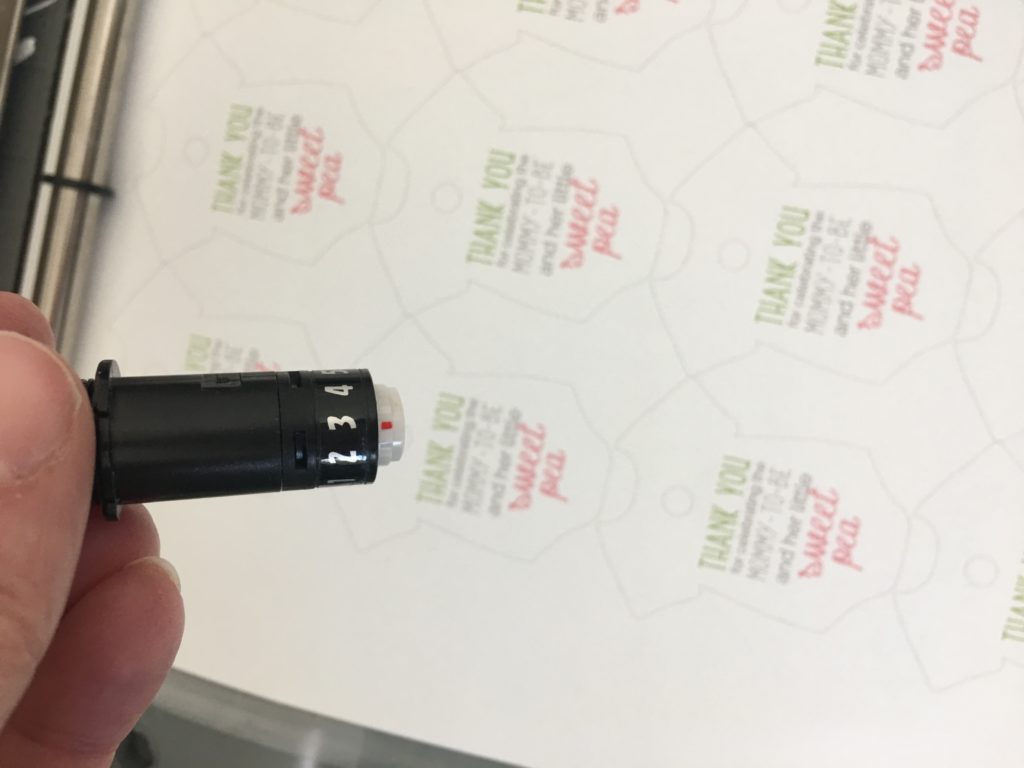
Make sure the material corresponds correctly (ie: card stock, if that’s what you are using) and set your blade to the number the program tells you.
After you have selected the material the machine will tell you what number to set the blade to. Check your blade and adjust accordingly.
Now click send to start the machine
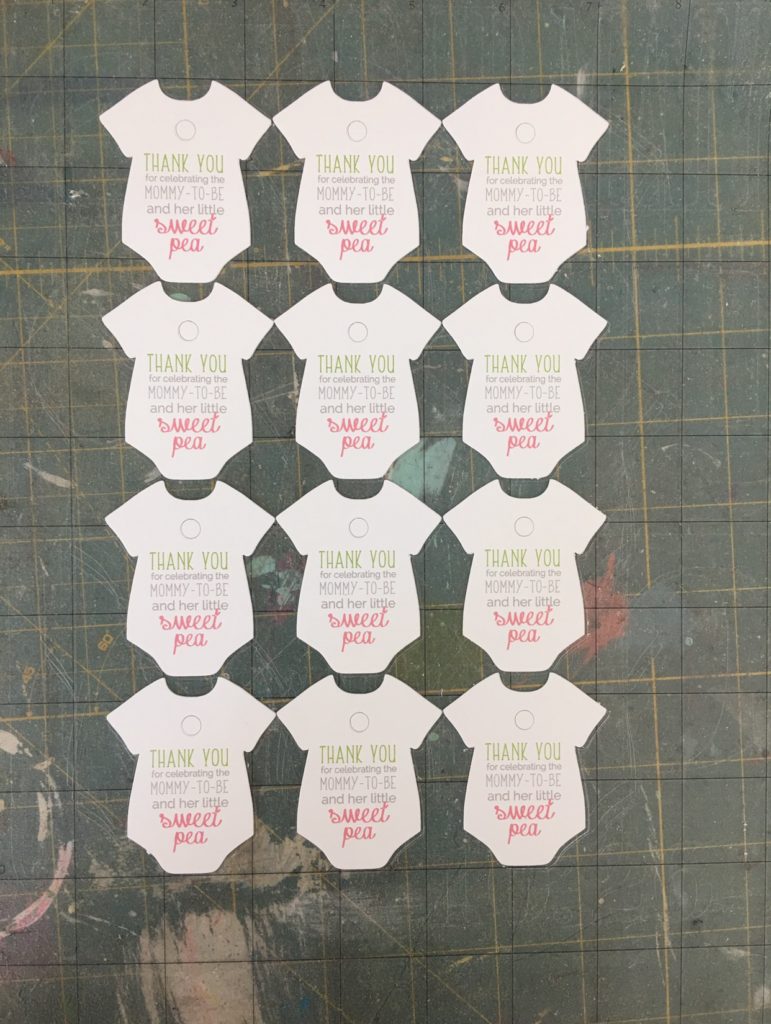
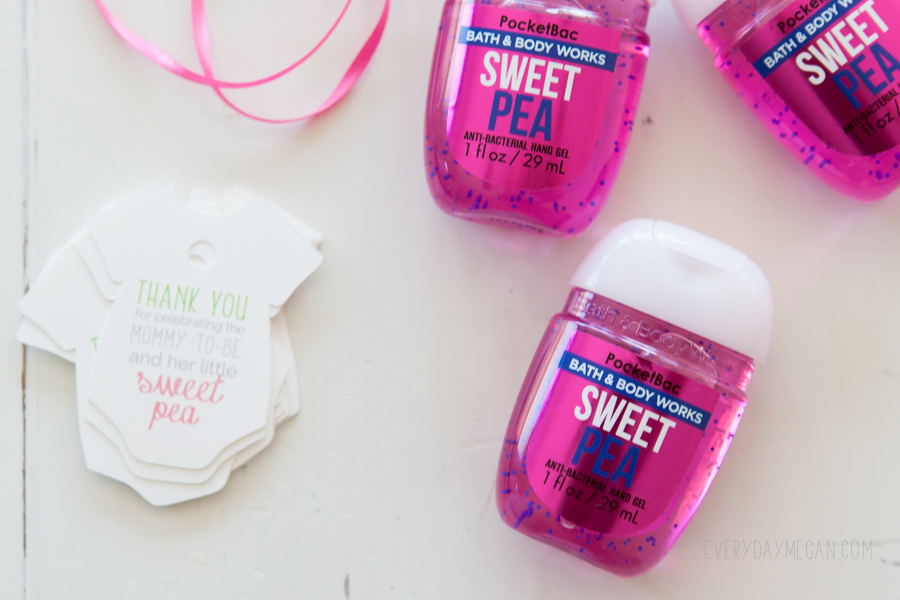
And assemble
I tied the ribbon around the neck first and secured it with a knot first.
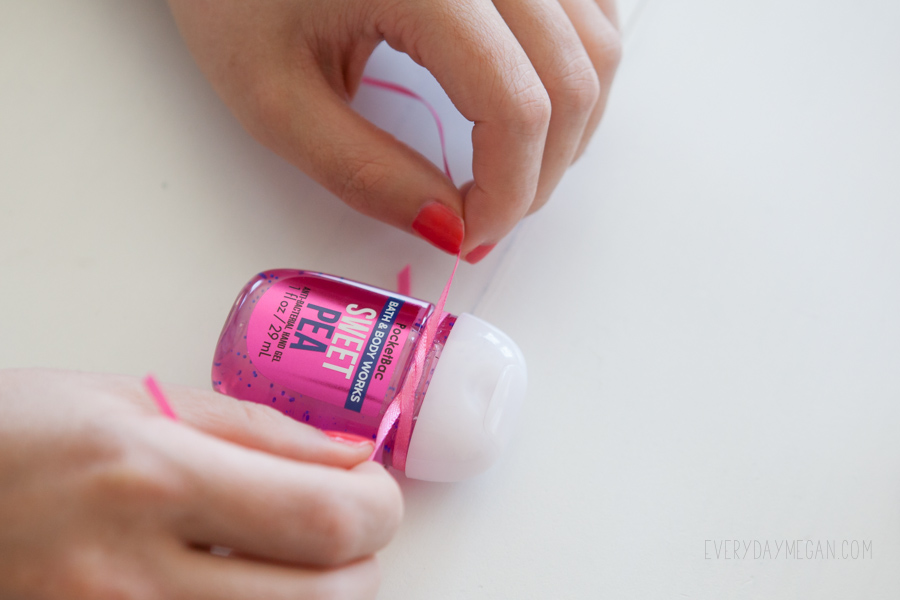
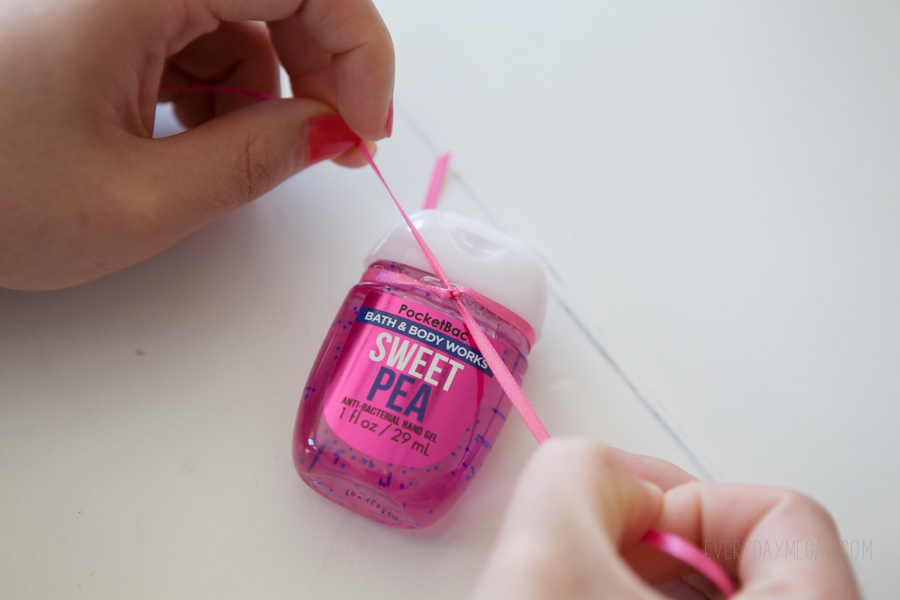
The I pulled the ribbon through and tied a bow.
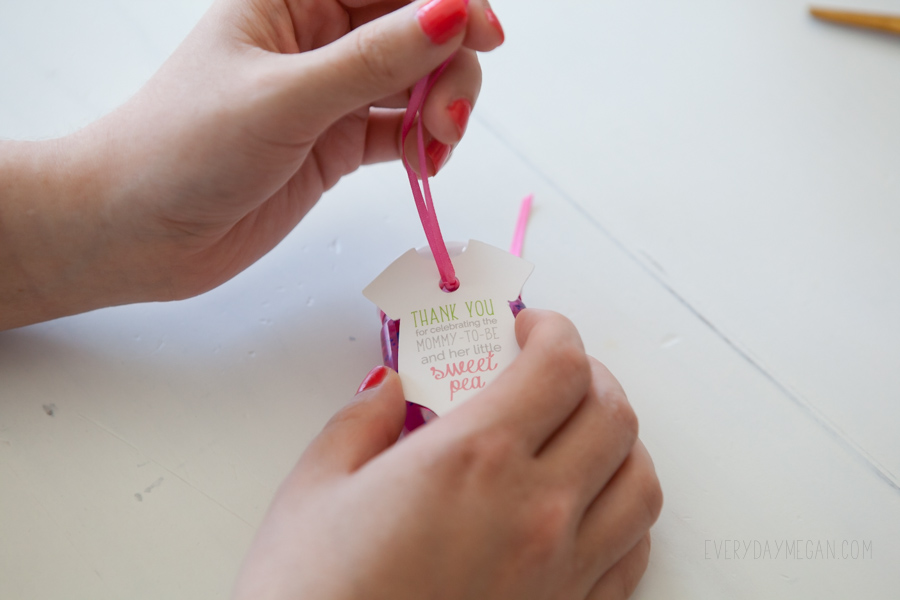
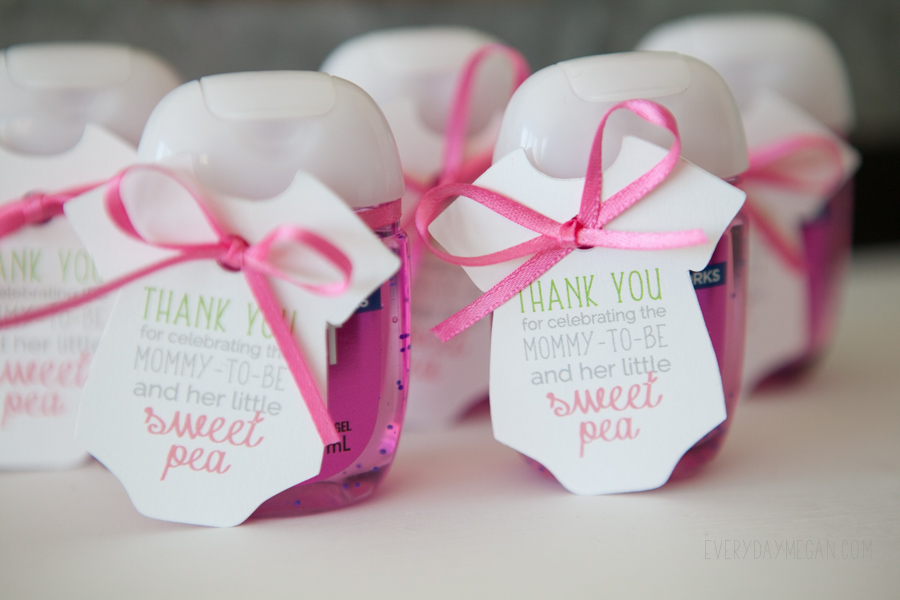
What do you think of this DIY baby shower favor?
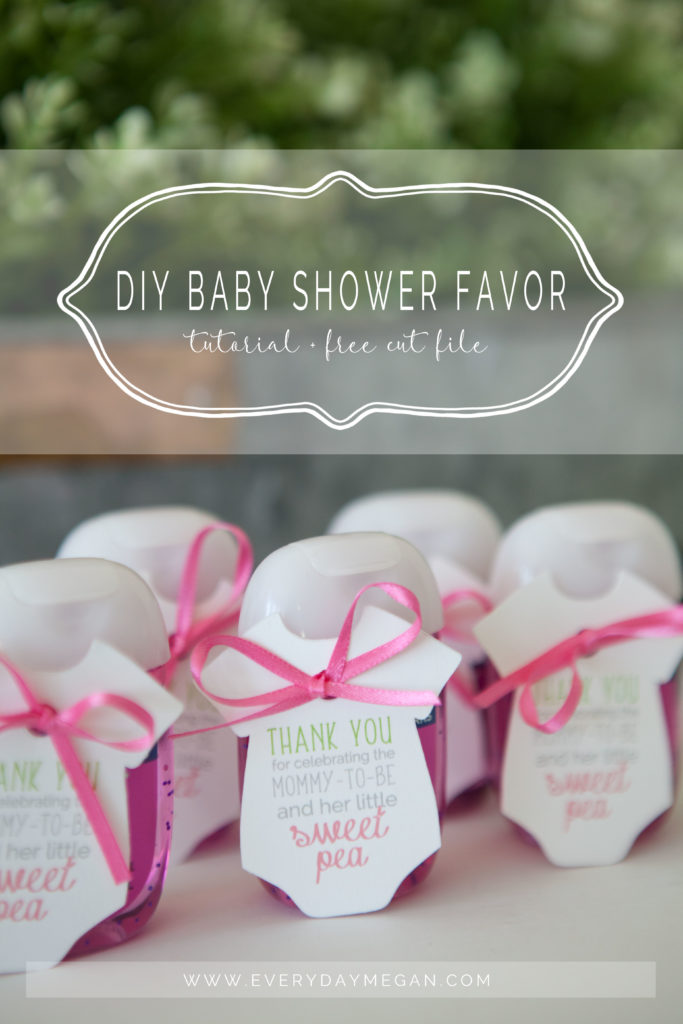
Love this project? Pin it so you don’t forget it!
Happy creating!

I requested a printable copy but have not received anything
Hi Jane – you should have received an email with the password to the resource library. You can find the library here: http://www.everydaymegan.com/resource-library You will need to enter the password and then you will have access to download design files.
Hello Megan,
I’d like to request a printable copy.
Thank you,
Mandy
clicked the “download here” and entered my information for the file. Site said to check my email….nothing. That was yesterday. 🙁
Hi Renee! I’ll have to look into this, thank you for letting me know. I just sent you an email with the info to log into the resource library.